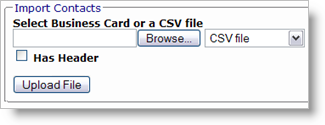
Importing from Outlook: Note that JibberJobber imports a .csv file or a vCard, which is what Outlook will spit out. Check out this post on how to get this file. JibberJobber does not import a .pst file, which means you actually have to go into Outlook and then go through its easy file export steps.
Importing from LinkedIn: at the bottom of your LinkedIn page is a link that says export all Connections (which creates a csv file). You should note that LinkedIn exports about 60 fields, most of them will be blank, and won’t import into JibberJobber. Also, note that you can edit this file, which means you can add or delete entire columns. I just had a user that imported from LinkedIn and then we was editing each record to put a rank and other info… I told him to delete all those that he imported,
Offline Networking? This is too cool -I was at a networking event where I collected about 10-15 cards. Not a lot but I hate spending time entering into a web form and then submitting (that 25th of a second gives me anxiety ;))… one after the other. So I created a csv file, used Excel to put the info in, and then uploaded it. It works like a charm! Here’s how it works. Download this file to you desktop (it is just a csv file, like an excel spreadsheet). Then, open in Excel and enter the info from the business cards, one person per row. DO NOT put in commas (I need a reminder on this when I get to the tags field), as that will mess it up :). Then, save the file (make sure it is still a csv, not an xls)… its now ready to import. I swear, if you have more than 3 records to enter you need to try this at least once – it is cool. Actually, sometimes I keep that csv file open during the day, add people as appropriate, and then upload all at the end of the day!
Tip 1: .csv just means a “comma separated value” file – so Excel, and JibberJobber, and other programs see each comma as the flag to “move to the next column. That’s why you don’t want to put a comma in the data that you enter!
Tip 2: If you have a messed up file you can likely fix it easily. One user had about 1,000 names and instead of having one column for first name and another column for last name, they were both in the same column 🙁 All we did was take that column, put it into NOTEPAD, and separate the names with a comma. Then, save as csv… its that easy. now you can just open that CSV file in Excel, copy the 2 columns, and paste them back into the original file. I know, I know, I need to make a video on this – I will.
Tip 3: in case you missed it, here is the csv file to download again. Very cool.
Tip 4: note that this is a premium feature. So, either DO IT in the first 14 days, or upgrade 🙂 Of course you can upgrade for 9.95 for 30 days and then let it go back to regular, at least that will give you 30 days to import, right? Trust me, its worth the $9.95 just for this import/export feature!
Tip 5: Here are the fields, case sensitive, that we import (the csv is already formatted, but if you are changing your LinkedIn file then you want to see this list!) – also, don’t put commas in your data!
- First Name
- Last Name
- Company
- Title
- Department
- Address
- City
- State
- Zip
- Country
- URL
- Work
- Phone
- Home Phone
- Cell
- Fax
- Initial Contact (the date of first contact -> mm/dd/yyyy)
- Rank
- Source
- Tags (separate each tag with spaces, not commas!)
- Notes
There you go, I hope that clarifies some of the power of importing 🙂

3 thoughts on “Importing into JibberJobber”
Comments are closed.